Timelines show a series of events, milestones, or deadlines in an easy-to-follow way. Luckily, PowerPoint makes it very easy to create one and even easier to customize it to your desired level of complexity. Beyond that, there are ways to utilize SmartArt, a built-in PowerPoint diagram-making tool to create something even more personalized. Here’s how to get started—and a few design tips to make your timeline more polished.

Open PowerPoint and either open an existing presentation or create a new one. Navigate to the slide where you want your timeline.
From the ribbon, select Insert > SmartArt. In the gallery on the left side, scroll down until you find Timeline. There are also other timeline-adjacent options under Process. For now, we will use the Small Dots Horizontal Timeline.

Once your SmartArt graphic is on the slide, click the placeholder title and type in the date. Put any supporting text below the dot.
In our example, this will be our data:
January 1, 2026: Project kickoff officially begins with initial planning
March 15, 2026: First prototype is developed and reviewed for early feedback
June 15, 2026: User testing phase begins, with participants providing insight
September 20, 2026: Launch goes live with full marketing campaign
Congratulations, you’ve completed a basic timeline. For some use cases, this is all you need to do, but we’re diving deeper today.
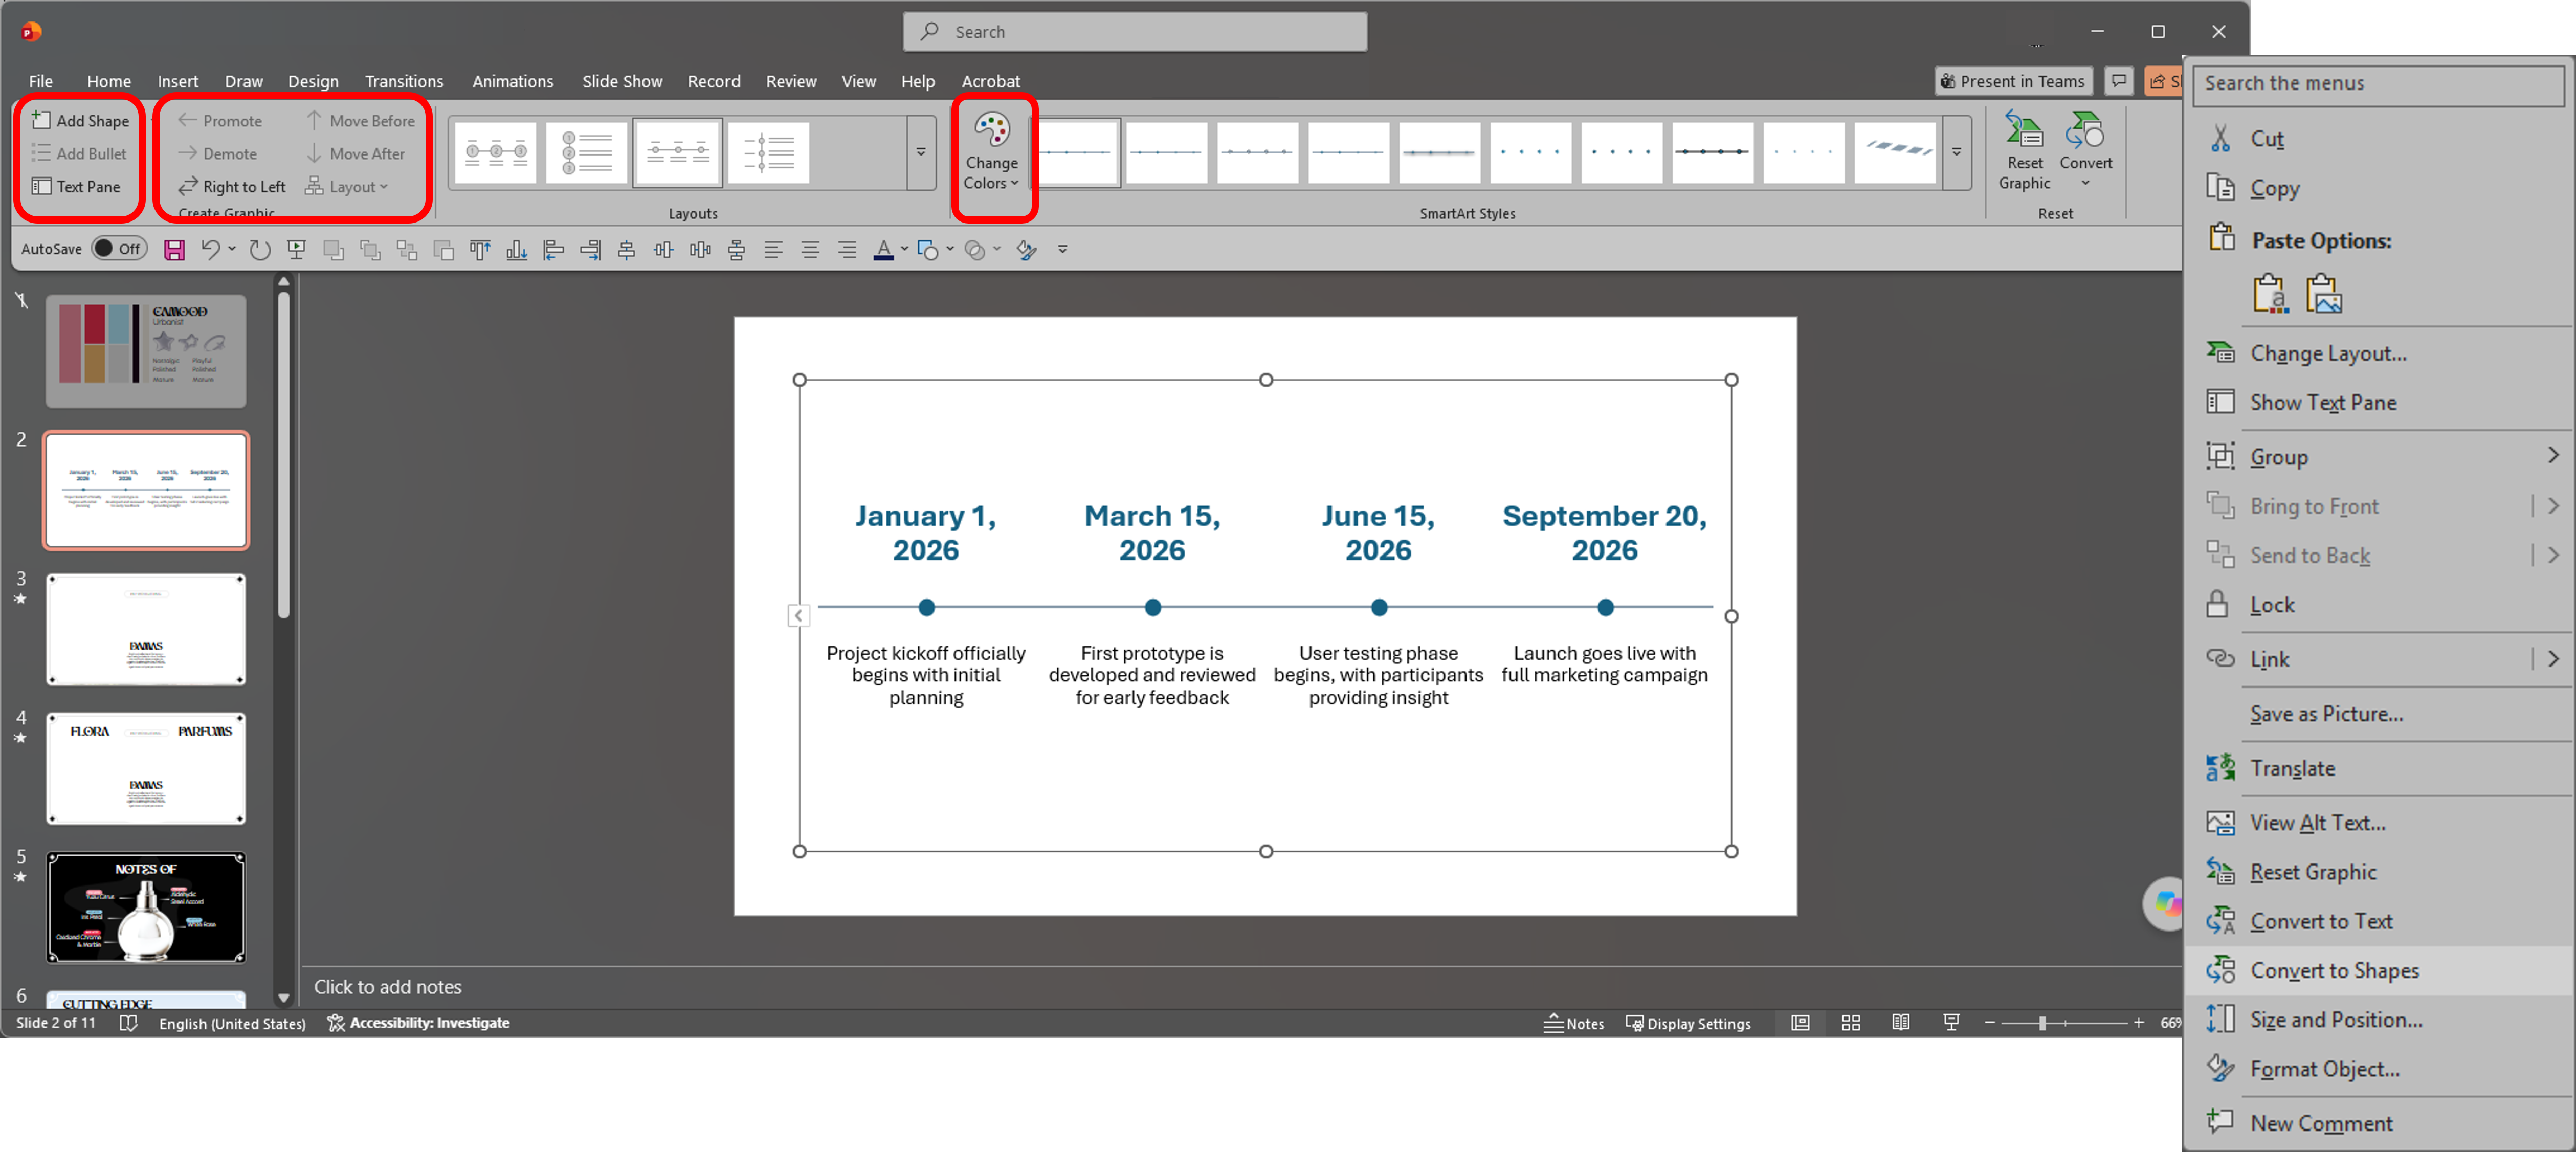
With SmartArt, you can add or subtract events by clicking the SmartArt and then clicking the SmartArt Design tab in the ribbon. From here, you can Add Shapes, Add Bullets, and move events sooner or later. You can also customize the look of your timeline if you want something different.
This can be done with the Change Colors feature to coordinate the timeline with your presentation’s template. For a more customized approach, you can add icons, pictures, or illustrations.
SmartArt is really a neat collection of lines, shapes, and placeholder text that can be easily customized and still work, despite how many times you change and move it around. But sometimes, you will reach a point where you are still unhappy with your SmartArt timeline. Luckily, there is another thing you can do.
Select your SmartArt timeline and either Right Click > Convert to Shapes or ungroup it with the hotkeys CTRL+SHIFT+G. From here, everything is in your control. You can:
But you need to be sure you’re up for the task, there’s no way to go back to SmartArt once you convert it.
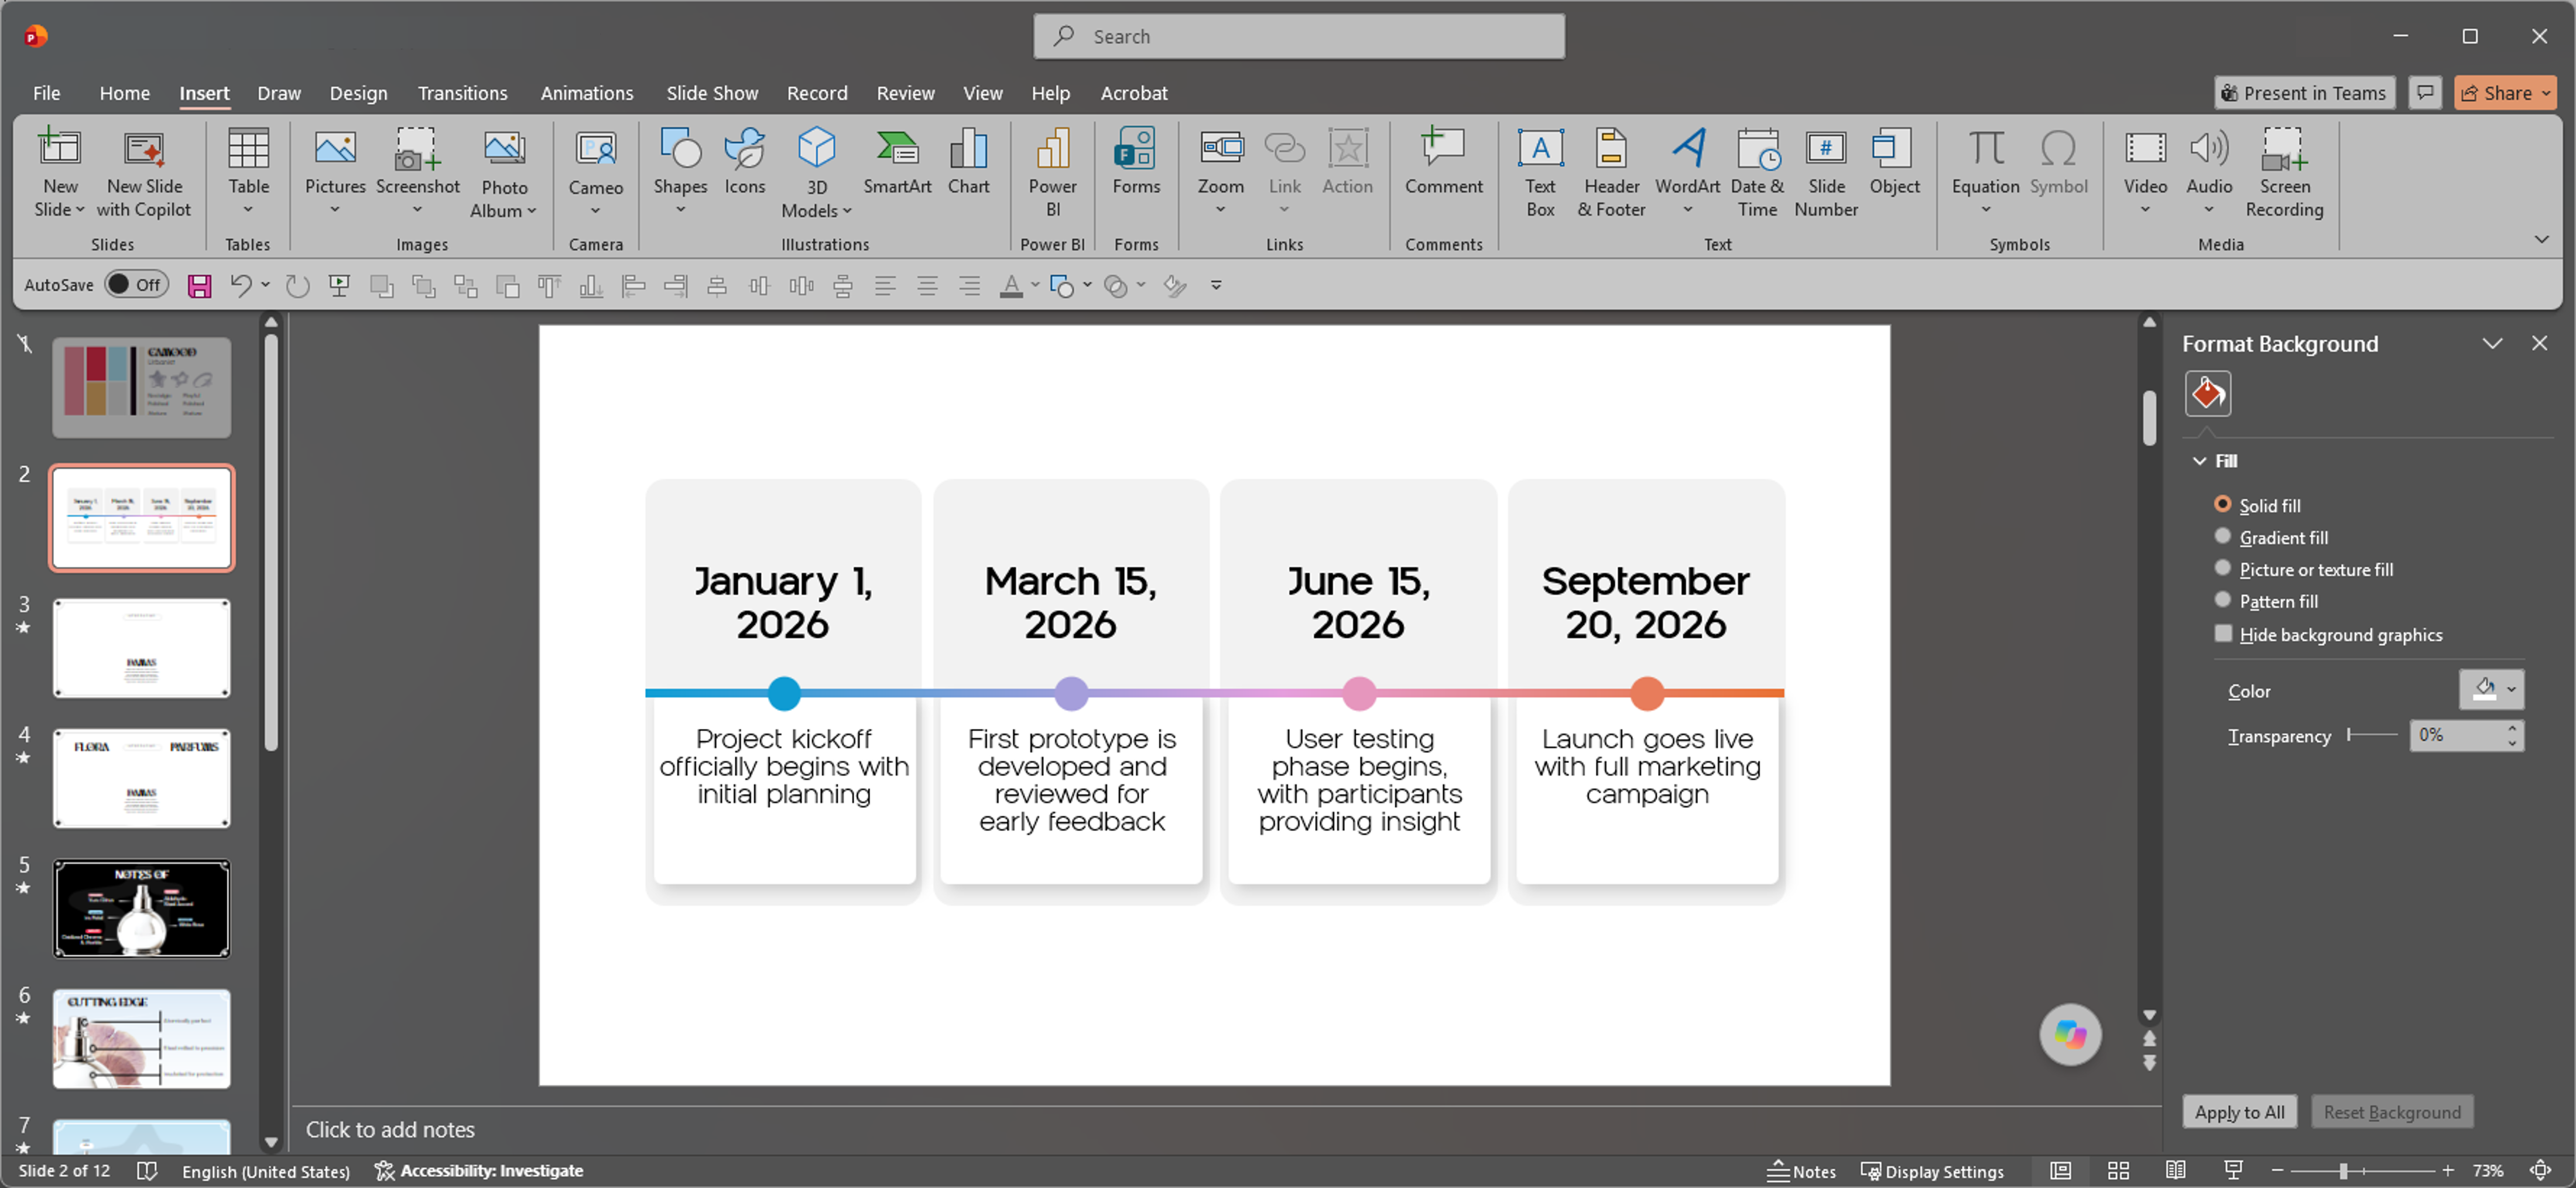
Knowing how to create a timeline is only the first step. The best timelines make information easier to understand at a glance. Start with the story you want the audience to see, choose only the milestones that matter, and then use PowerPoint's design tools to create a clear visual hierarchy.
From there, you can use SmartArt to get you 80% of the way there. Then with some light customizing you can have a keynote-level timeline ready in minutes. If you want to push it even further, simply convert the timeline and let your creativity flow, knowing you have a solid foundation to build upon.